
Hello from OMNIVAS.
In this article, we will explain in detail how to use the Lightroom Classic plugin “Label
Sync”.
We will show you step-by-step how to reflect ratings and color labels selected in ShutterSnitch onto your RAW
files in Lightroom Classic.
📌 What is Label Sync? If you are new here, please visit the Official Page first.
Table of Contents
- Step 0-A: Preparation on Lightroom Classic (Plugin Installation)
- Step 0-B: Preparation on ShutterSnitch (Export Settings)
- Step 1: Operation on iPad (ShutterSnitch)
- Step 2: Operation on PC (Lightroom Classic)
- Troubleshooting
💡 Step 0 (A & B) need to be done only once. Once set up, you can start from Step 1 next
time.
Step 0-A: Preparation on Lightroom Classic (Plugin Installation)
First, install the Label Sync plugin into Lightroom Classic.
0-A-1. Download the Plugin
Download the plugin from the Label Sync Official Page.
Unzip the downloaded ZIP file and move the LabelSync.lrplugin (or LabelSync4LrC.lrplugin)
folder to the following recommended location.
Recommended Location
【macOS】
/Users/<Username>/Library/Application Support/Adobe/Lightroom/Modules/
* If the “Modules” folder does not exist, please create it.
* You can access the “Library” folder by holding the Option key while selecting the “Go”
menu in Finder.
【Windows】
C:\Users\<Username>\AppData\Roaming\Adobe\Lightroom\Modules\
* Similarly, create the “Modules” folder if it doesn’t exist.
⚠️ Caution: Do not remove the contents. Move the entire
LabelSync.lrplugin folder.
Also, do not delete or move the folder once placed.
0-A-2. Open Plug-in Manager in Lightroom Classic
Launch Lightroom Classic and select “File” → “Plug-in Manager” from the menu.
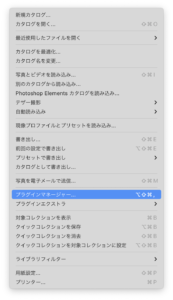
“File” → “Plug-in Manager”
0-A-3. Add the Plugin
In the Plug-in Manager, click the “Add” button and select the
LabelSync.lrplugin folder you saved earlier.
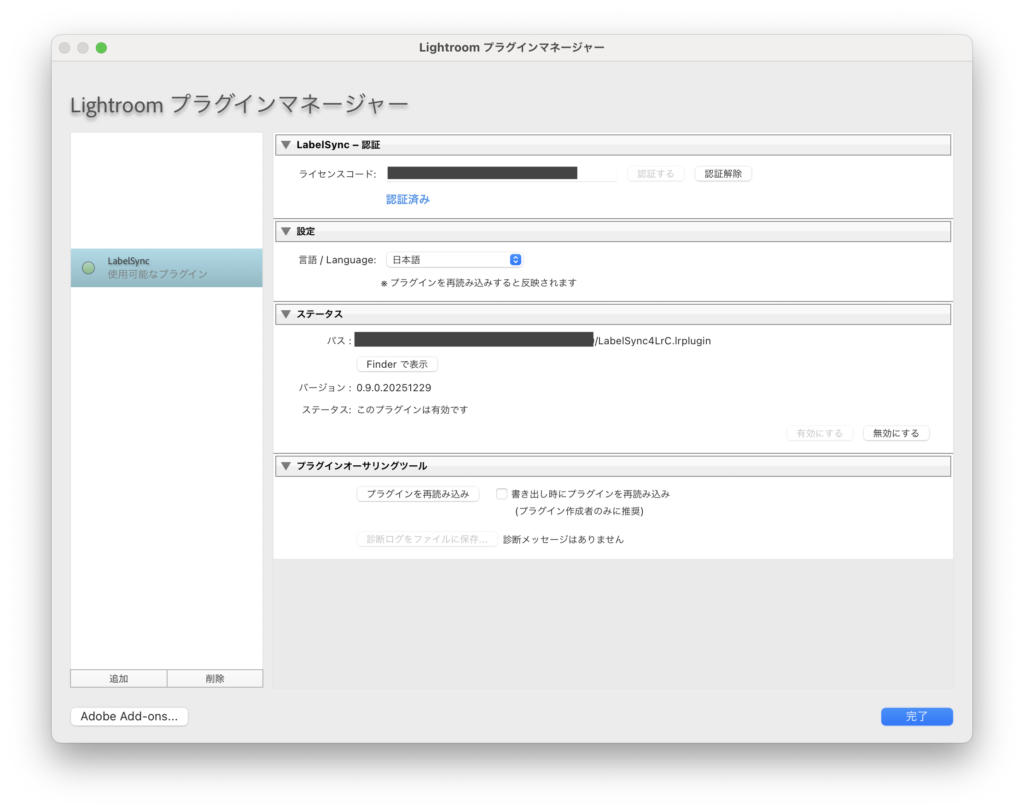
If the plugin appears in the list and the status is “Installed and running”, you are good to
go.
Click “Done” to close the Plug-in Manager.
0-A-4. Activate the Plugin
- Purchase the plugin license from the Official
Page. - Copy the activation code sent to your registered email address.
- Paste it into the License Code field at the top of the Plug-in Manager screen and click the
Activate button.
- Once activated, a blue confirmation message will appear at the bottom.
- During the trial period before activation, there are limits on processing count and trial duration.
- System Requirements: Lightroom Classic 11.0 or later (macOS / Windows)
- Supported Languages: Japanese, English, Korean, French, Spanish, German, Simplified
Chinese, Traditional Chinese, Danish
Step 0-B: Preparation on ShutterSnitch (Export Settings)
Next, check and change the export settings in ShutterSnitch.
* Assuming ShutterSnitch installation and camera connection setup are complete.
0-B-1. Log in as Superuser
Open ShutterSnitch and log in with Superuser (Admin) mode.
0-B-2. Open Options
Tap the Menu icon in the top left of the default screen.
The collection view will appear, so
tap “Options” in the top left.
0-B-3. Go to Settings → Advanced
Tap “Settings”, then tap the “Advanced” tab.
0-B-4. Change Export Settings
Swipe down to find the “LISTS / LIGHTROOM CLASSIC PLUG-IN” section.
Change the following two items:
- Export Fields: Tap and select “Filename, Rating, Capture Time,
Label” - Sharing Format: Tap and select “CSV” or “Plain Text”
Now ShutterSnitch preparation is complete.
Step 1: Operation on iPad (ShutterSnitch)
Folders in LrC = Collections in ShutterSnitch.
Please create collections in ShutterSnitch according to your
workflow before shooting.
After shooting and selecting are done, export the info from ShutterSnitch.
1-1. Switch to Grid View and Select Photos
- If in single view, tap the “Grid View Button” in the top left to switch to grid view.
- Tap the “Select Button” in the top toolbar.
- In the selection screen, tap “Select All”.
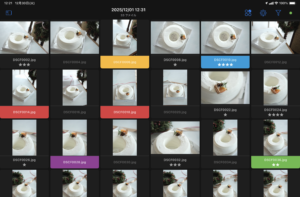

The Select button appears in the top toolbar in Grid View.
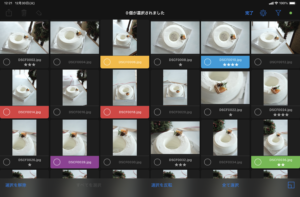
1-2. Export list
When images are selected, the “Share Button” on the left of the toolbar becomes active.
- Tap the Share Button and select “List”.
- In the popup, choose either “Mail or File Sharing”.
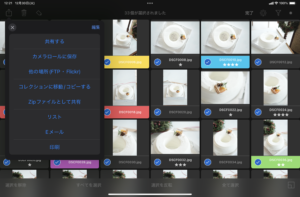
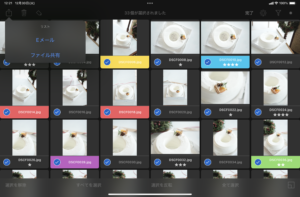
Select “List” → “Method (Mail/File Sharing)”
1-3. Send to PC
Choose CSV or Text format and send it to your PC via
AirDrop or other methods.
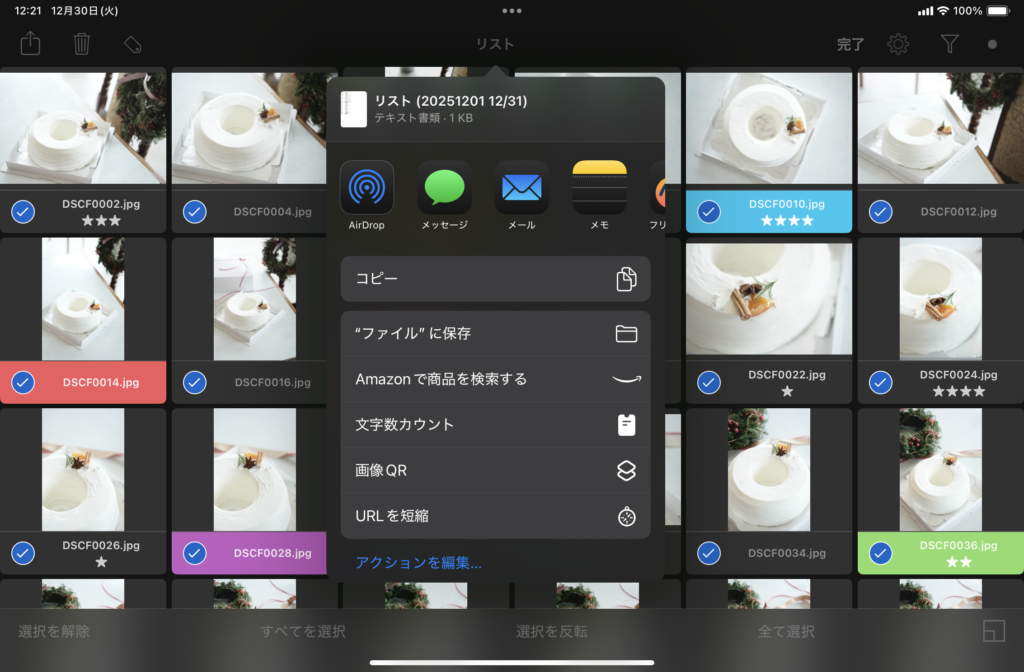
AirDrop is easiest for Mac users.
💡 Tips: Besides AirDrop, you can use email attachments or cloud storage (iCloud,
Dropbox, Google Drive) logged in on iOS.
Step 2: Operation on PC (Lightroom Classic)
Open Lightroom Classic and display the target folder (catalog).
At this time, ensure photos in the folder are either “Unselected”, “Only 1 selected”, or “All selected”. If
“Multiple (but not all) are selected”, the sync will only apply to those selected images.
2-1. Launch Label Sync
From the menu, select “File” → “Plug-in Extras” → “Label
Sync…”.
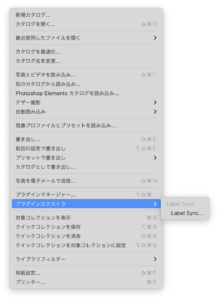

Select “Label Sync…” from the “File” menu
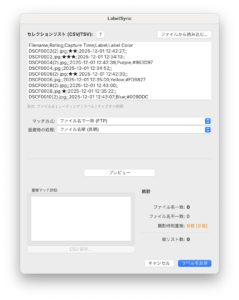
2-2. Load List and Preview
- Select and load the list file (CSV or Text) exported from ShutterSnitch.
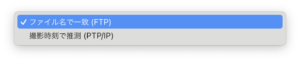
- Choose a matching method. Use “Match by Filename” for FTP. For camera wireless connections where filenames
differ, use “Guess by Capture Time”. - Click the “Preview” button.
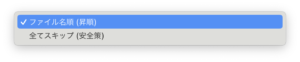
- Comparison is performed against all images in the selected folder. If “Guess by Capture Time” is used,
potential duplicates are shown in “Duplicate Match Details”. Results can be saved as CSV.
-

- マッチ方式
-
- 重複時の処理
-
- リスト読み込み時
-
- 撮影時刻で推測時の重複

Load list and click “Preview”
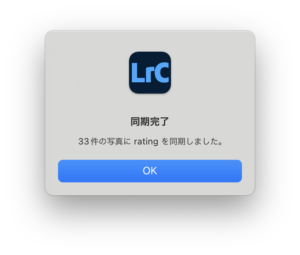
2-3. Sync
If the preview looks good, click Sync.
The plugin will match filenames (or capture times) and automatically apply stars and color labels to the
corresponding photos.
-
- 同期完了!
-
- LrCのフォルダ内にラベルとレーティングが反映されました
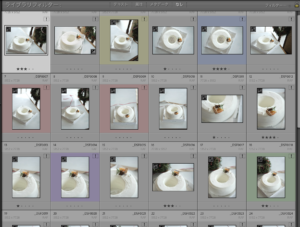
Select CSV and click “Sync”
No more time spent “Searching for images → Entering data”.
Start developing immediately. Minimize input errors.
📋 About Overwriting Behavior
- Ratings and Labels in the list (CSV) will overwrite existing values in Lightroom
Classic. - However, images marked as “None” (Rating 0, No Label) in the list will
keep their existing evaluation in Lightroom Classic (will not be overwritten). - Images not listed in the CSV are not affected at all.
Troubleshooting
If sync doesn’t work well, check the following:
- Check Export Settings: Ensure Step 0 settings are correct. Especially, make sure “Capture
Time” is included in “Export Fields”. - Check Target Folder: Ensure the folder containing the photos to sync is selected in
Lightroom Classic. - Filename or Capture Time: Label Sync matches by Filename or Capture Time. If JPEG and RAW
filenames differ, Capture Time matching is used. - Selection State in LrC: If the expected number of files don’t match, check if you have only
“a few” images selected. Select “None”, “Only 1”, or “All”.
If still not resolved, please contact us via the Contact Form.
Download
* Supports Windows / Mac
Related Articles